Exercises and Worksheets: Quarter 3
*Click on photos to see full size.
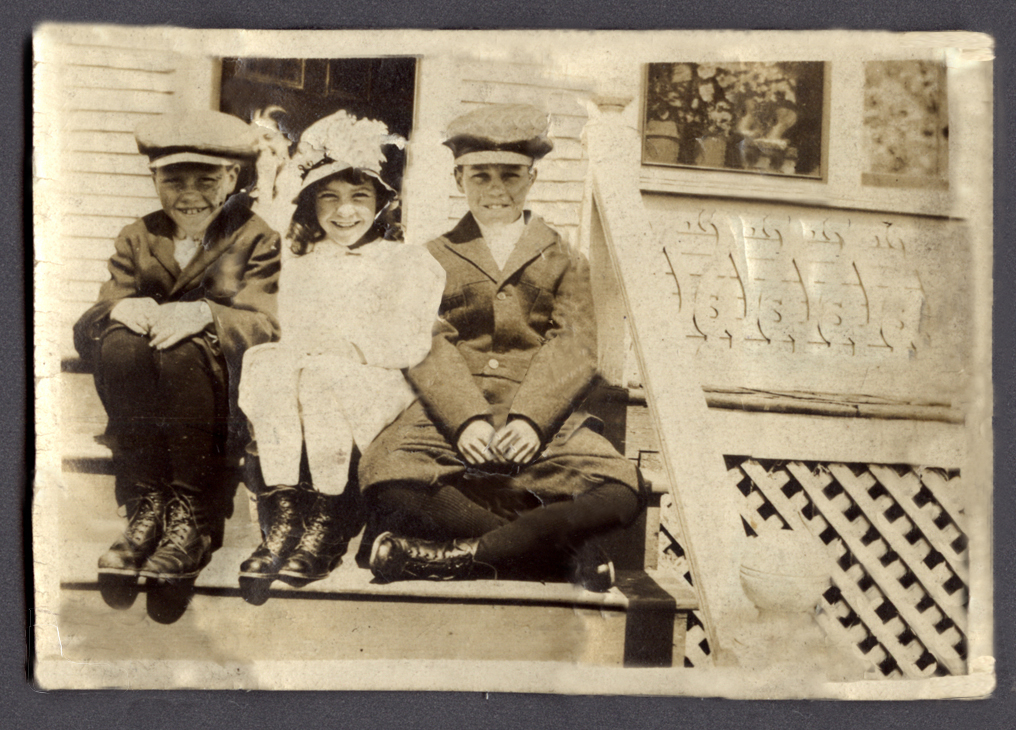
Three kids exercise:
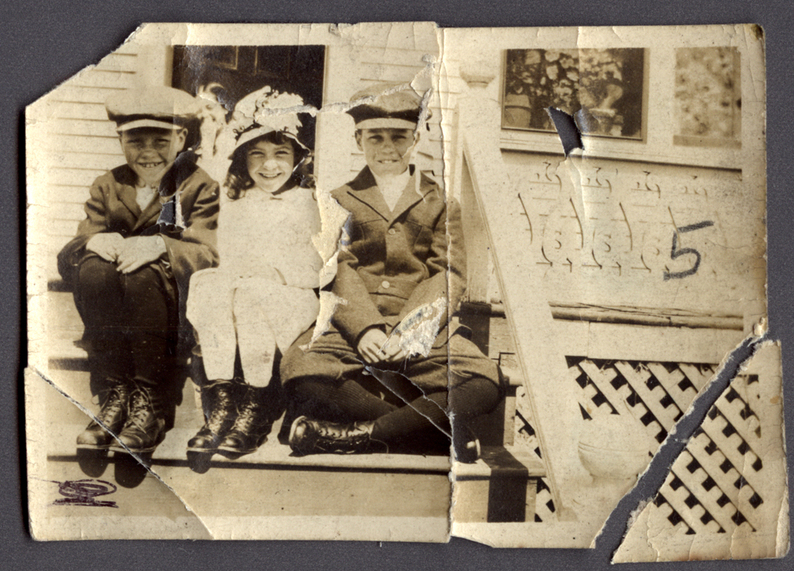
Before: Picture was clearly damaged. It has two ripped corners, holes, and harsh folds. The edges are also cracked, there is fading, and writing on the photo.
After: Corners are put back into place and edges are smoother. The creases are fixed, as well as the holes in the photo. Writing was removed from the photograph.
After: Corners are put back into place and edges are smoother. The creases are fixed, as well as the holes in the photo. Writing was removed from the photograph.
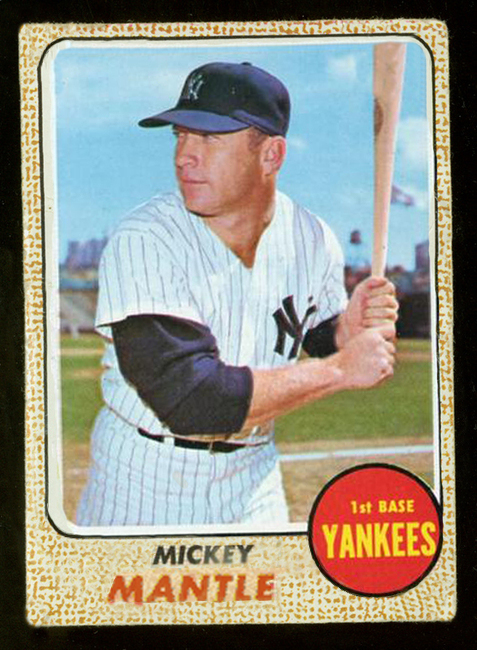
Baseball Card exercise:
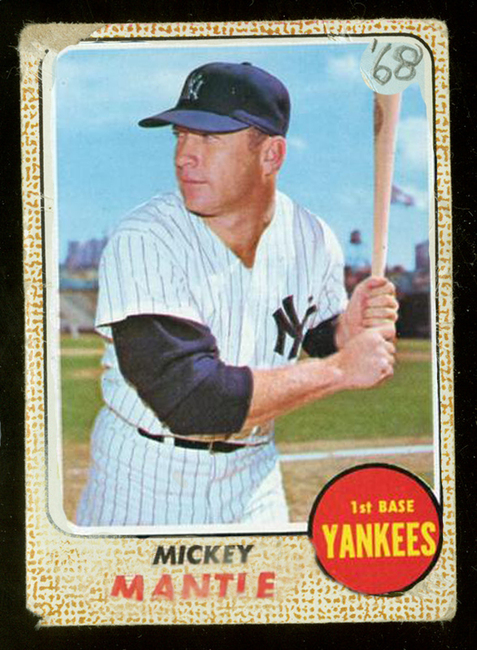
Before: Baseball card of famous Mickey Mantel has damaged corners and writing on it, as well as faded areas. In mint condition, the card is worth about $500.
After: Corners are redone and the fading is fixed. The writing that was in the right-upper corner has been removed.
After: Corners are redone and the fading is fixed. The writing that was in the right-upper corner has been removed.
Fixing Old Photographs:
Before: The bottom picture is ripped and damaged, as well as in black and white. The top picture is what is intended to be replicated.
After: Color is restored and the picture is filled.
After: Color is restored and the picture is filled.
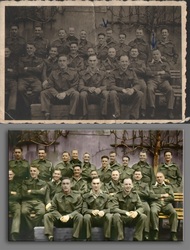
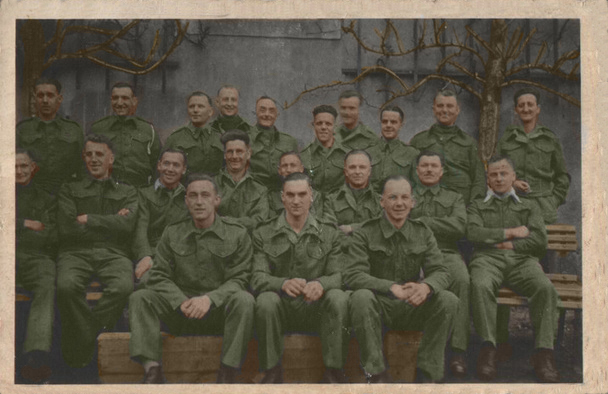
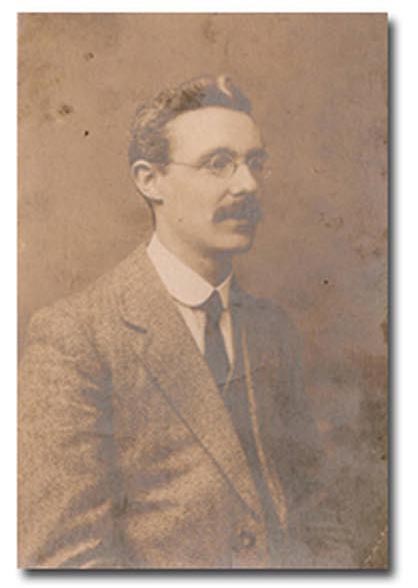
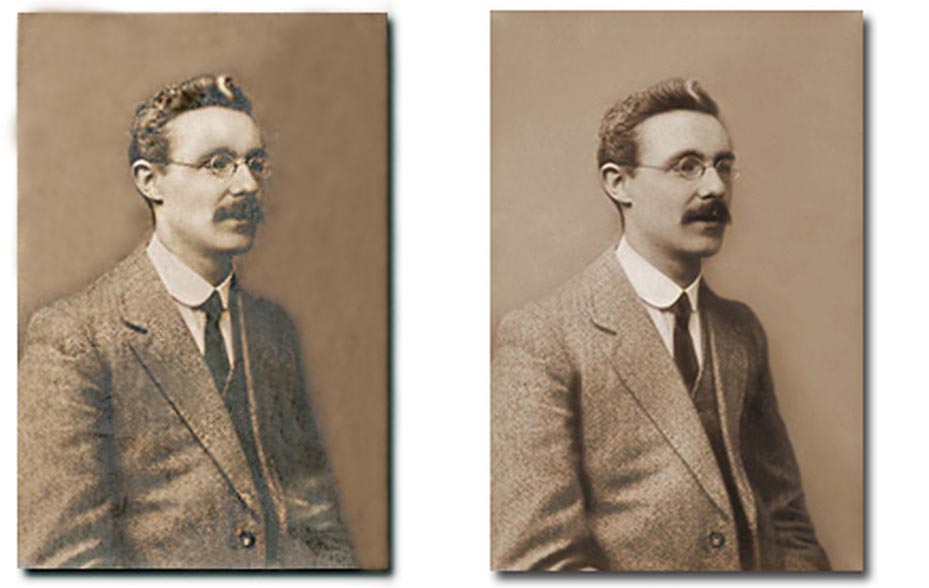
Before: The top left photo of the men is damaged on the sides, faded, and written on. The goal was to edit the photo to look like the one underneath it.
After: The photo on the right is color restored and fixed to look like the lower left photo.
After: The photo on the right is color restored and fixed to look like the lower left photo.
Placing Picture in Gallery Exercise:
Before: The top picture on the left is a gallery with 5 empty photo frames. The objective was to fit the lower left photo in each frame.
After: The lower left photo is in all five frames in the gallery.
After: The lower left photo is in all five frames in the gallery.
Two Half Match Exercise:

Before: An unedited photo of the woman.
After: On the left is an edited version of the woman. The task was to match the edited photo on the right.
After: On the left is an edited version of the woman. The task was to match the edited photo on the right.
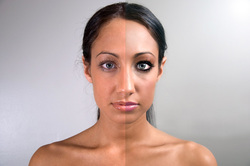
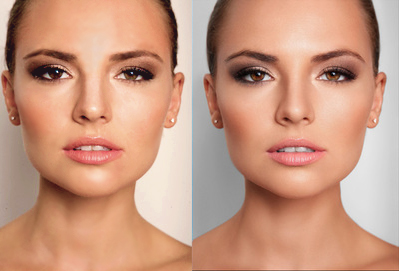
Before: Half of the woman's face (the left) is unedited and unretouched. The goal was to edit the left side of the photo to match the right side (edited) version of the woman.
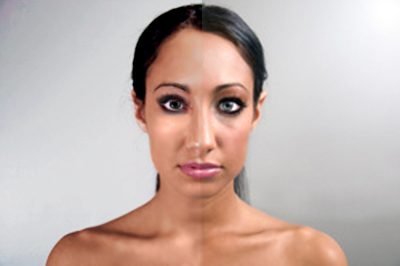
After: The left side of the face is retouched to match the right side of the woman's face.
After: The left side of the face is retouched to match the right side of the woman's face.
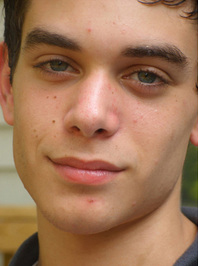
Before: The picture on the left is not retouched or edited. In the picture farthest right, the boy has been edited. The goal was to make the starting picture look like the one farthest right.
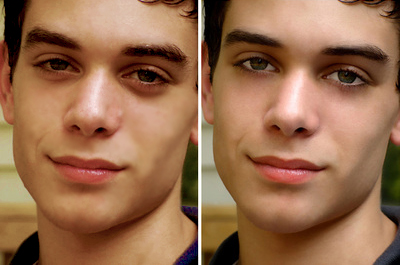
After: The picture of the boy in the middle has been retouched and edited to look like the one farthest right.
After: The picture of the boy in the middle has been retouched and edited to look like the one farthest right.
Exercises and Worksheets: Quarter 4
Illusion Exercise:
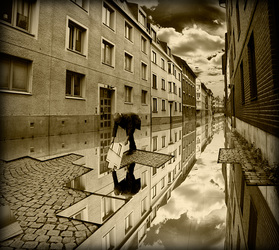
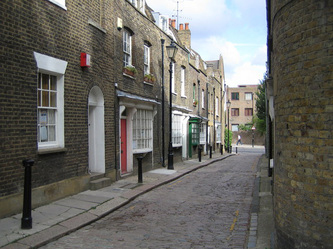
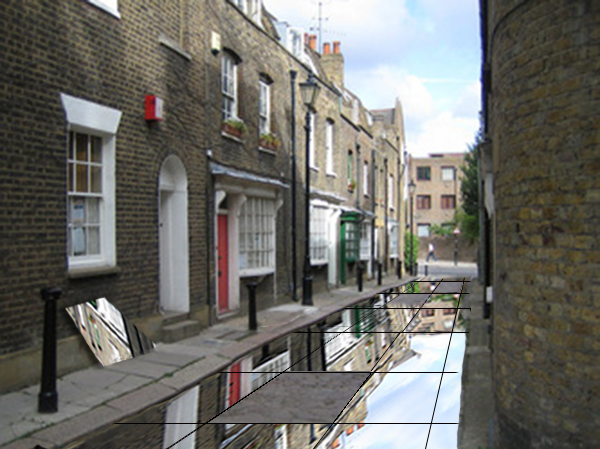
Before: The picture on the left is a scene created by Erik Johansson where the alleyway appears to be a mirror. The center image is an alleyway which will be used to mimic Johansson's work.
After: The alleyway was digitally made to look+ as though there is a mirror on the ground. There are pieces missing and one resting against the side of a building to create a more realistic effect.
After: The alleyway was digitally made to look+ as though there is a mirror on the ground. There are pieces missing and one resting against the side of a building to create a more realistic effect.
Extract the Subject Exercise:
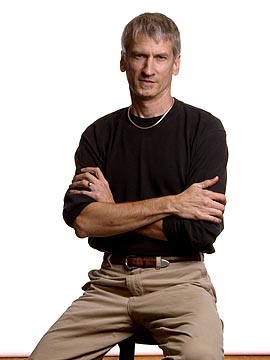
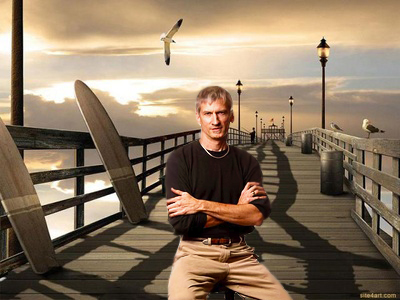
Before: The left picture is a scenery with lighting and angles different than the man in the middle. The objective was to place the man in the middle into the scenery.
After: The man is placed into the scenery according to lighting and angle. He is turned facing the other way and the filter on him has been adjusted to match the background.
After: The man is placed into the scenery according to lighting and angle. He is turned facing the other way and the filter on him has been adjusted to match the background.
Photo Restoration Exercise:
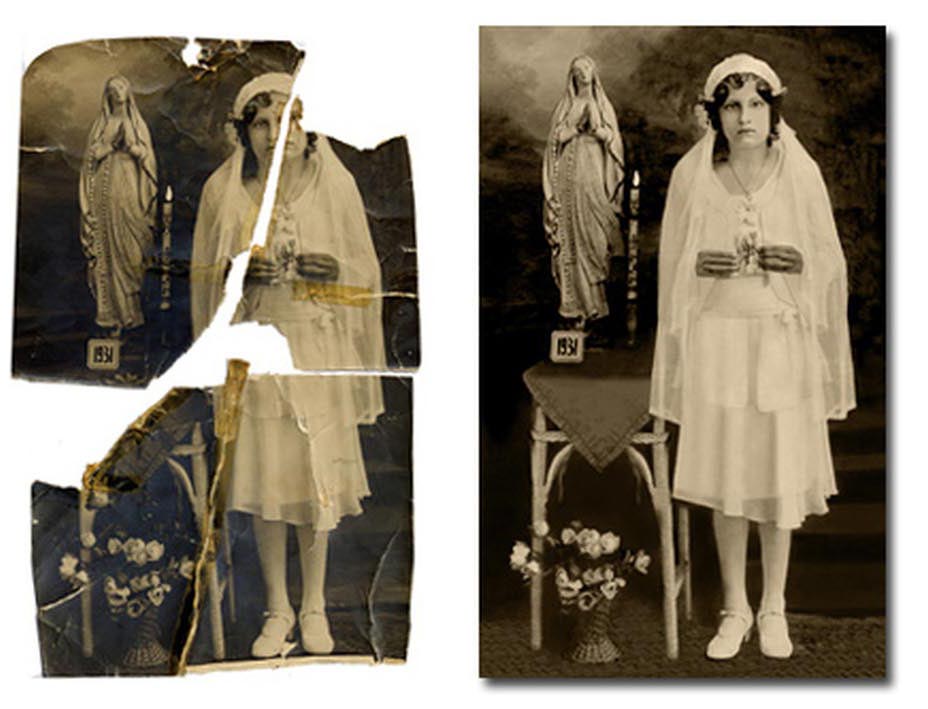
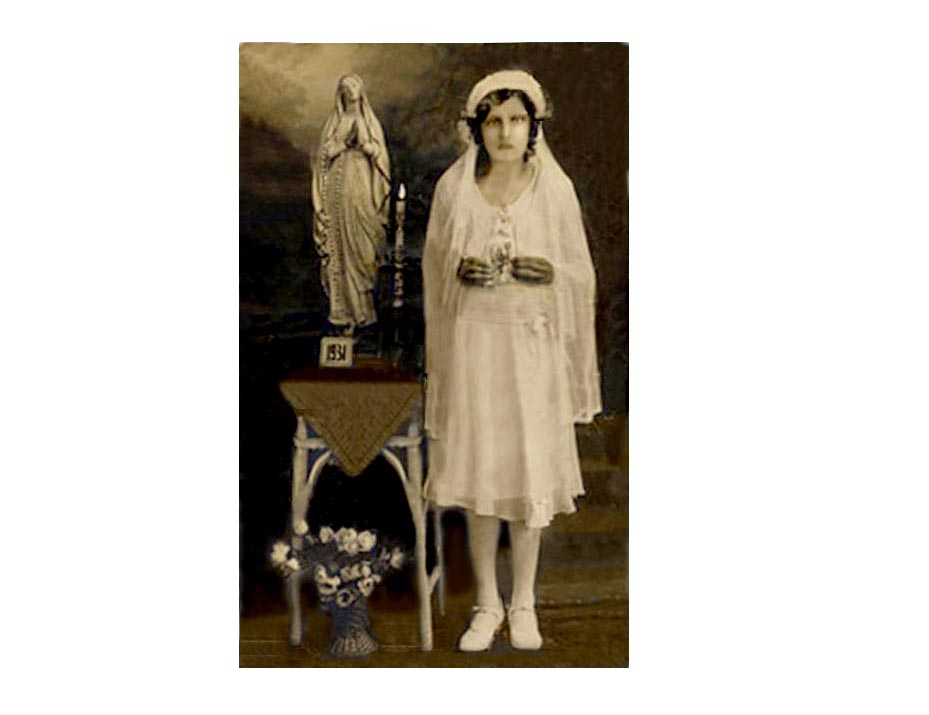
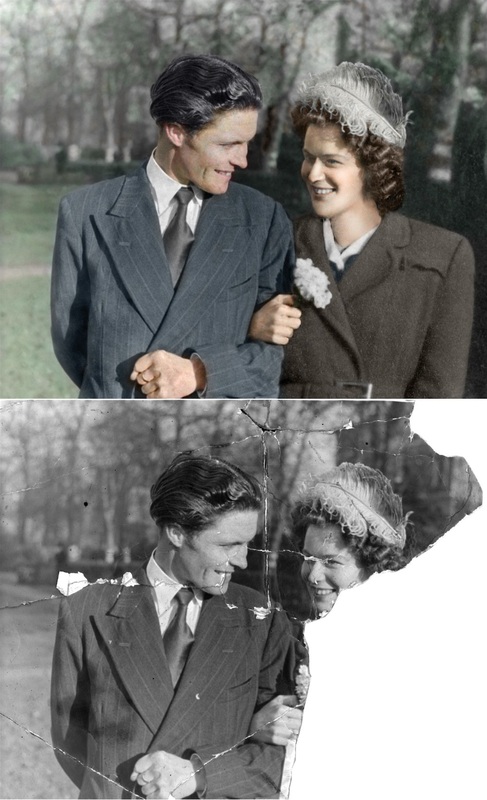
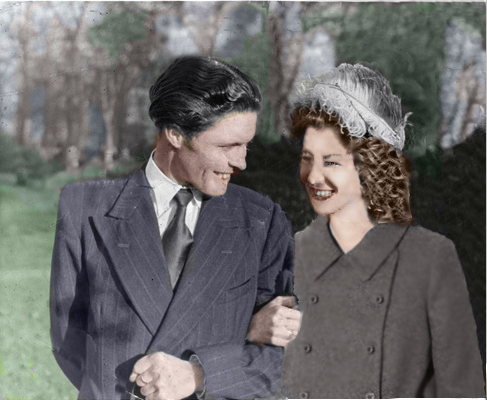
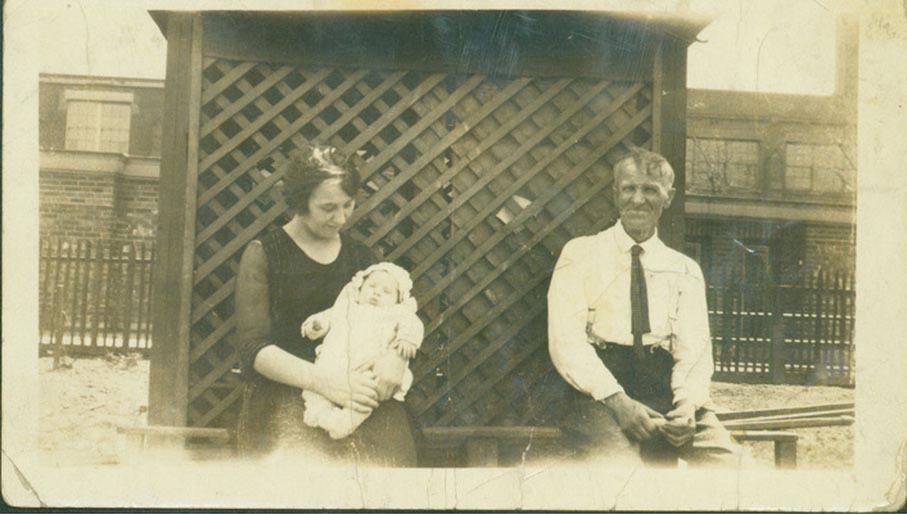
Before: The photo on the left is fragments of a wedding picture from 1931. It had fading and severe damage done to it. The photo in the middle is a reference for what the photo should look like.
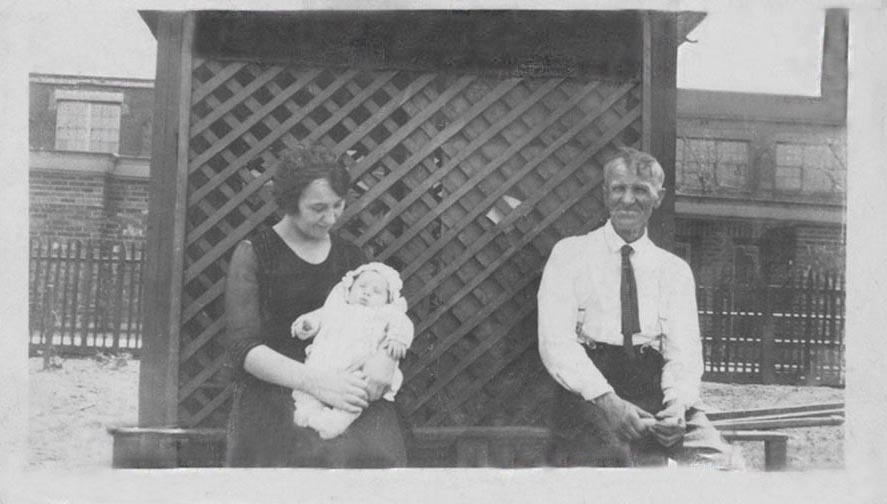
After: The photo on the right has been pieced back together and restored to match (as close as possible) the center photo.
After: The photo on the right has been pieced back together and restored to match (as close as possible) the center photo.
Before: The photo on the left is faded and has blotches from age. The photo on the left is fixed to a professional level.
After: The center photo is edited to attempt to match the photo on the left. The fading has been fixed ad blotches edited out, as well as the color redone.
After: The center photo is edited to attempt to match the photo on the left. The fading has been fixed ad blotches edited out, as well as the color redone.
Before: The picture on the left is faded around the edges and is yellow from age. It also has many creases and wrinkles in it.
After: The photo is restored to a black and white coloring and the fading on the edges have been fixed. The creases and folds have also been smoothes over and edited out.
After: The photo is restored to a black and white coloring and the fading on the edges have been fixed. The creases and folds have also been smoothes over and edited out.
Morphing Pictures:

Before: A picture of two people whose faces will be morphed together.
After: The facial structure, hair, eyebrows, and lips are used while the nose, eyes, and teeth of the boy are used in the face morph.
After: The facial structure, hair, eyebrows, and lips are used while the nose, eyes, and teeth of the boy are used in the face morph.
